Button
There are many ways we can provide input to the Arduino. One simple way is with a push button. This Activity uses a push button to turn an LED, specifically the built-in one on pin 13, on or off.
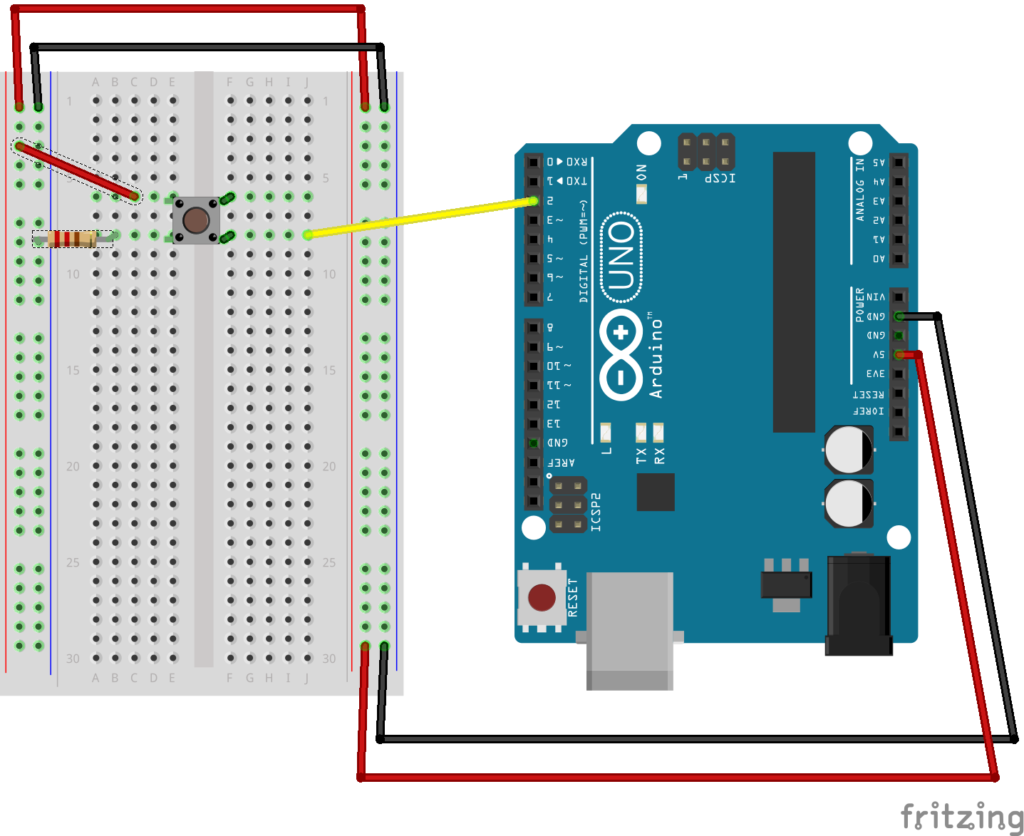
First, we must create the circuit. Our push-button is normally open, meaning the circuit is not normally complete. The Digital Pin 2 is therefore normally connected to ground through the 10K resistor; therefore the state we would read (digitalRead) is LOW. When we push the button we connect 5Volts to the digital pin. A digitalRead would indicate the state as HIGH.
Our code below allows us to turn the Arduino LED on and off using the push-button switch.
/*
  Push Button Activity
  Turns an LED on or off dependent on its' current
  state with a press of the push button.
  If LED is on it will be turned off.  If off
  then on.

*/

/*Set up constant variables.  A constant variable
 * cannot be modified in the runnin program
 */
const int buttonPin = 2;     // the number of the pushbutton pin
const int ledPin =  13;      // the number of the LED pin
const bool on=true;          // On = True
const bool off=false;        // Off = False


// Globabl Variables.  for our program
int buttonState = 0;         // variable for reading the pushbutton status
bool LedState=off;           // variable to keep track of the LED Status


//The setup function runs once.
void setup() {
  // initialize the LED pin as an output:
  pinMode(ledPin, OUTPUT);
  // initialize the pushbutton pin as an input:
  pinMode(buttonPin, INPUT);
}

void loop() {
  // read the state of the pushbutton value:
  buttonState = digitalRead(buttonPin);

  // If the buttonState is high, the button is pressed
  if (buttonState == HIGH) {

    if(LedState==off){   //if the LED is off turn it on

      digitalWrite(ledPin, HIGH);
      LedState=on;
      delay(500);
    }else{   //otherwise the LED is ON, turn it off
      digitalWrite(ledPin, LOW);
      LedState=off;
      delay(500);

    }
  }
}